How to Install Kitchen Profiles for a Sleek & Modern Look
Modern kitchens have evolved beyond bulky handles and traditional knobs. Today, more and more homeowners and interior designers are choosing handleless kitchen designs that are minimalist, elegant, and space-saving. At the heart of this trend are kitchen profiles—functional hardware pieces that help achieve that streamlined look while adding durability and style.
If you're considering a modular kitchen setup or want to upgrade your cabinets, this blog will guide you on how to install kitchen profiles like a pro. Whether you're a DIY enthusiast or helping your clients make smart hardware choices, this guide has everything you need.
🔍 What Are Kitchen Profiles?
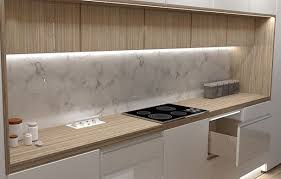
Kitchen profiles are linear fittings—usually made of aluminum or stainless steel—that replace traditional cabinet handles. These profiles run along the top or sides of drawers and shutters, allowing users to open cabinets with a seamless grip. They offer a clean, clutter-free aesthetic that defines today’s modern kitchen.
✨ Types of Kitchen Profiles
-
Profile Type Shape Installation Position Look & Feel Best For G-Profile G-shaped channel Top edge of drawers or doors Very sleek, fully handleless Modern minimalist kitchens C-Profile C-shaped channel Top of base cabinets Slightly visible groove, easy grip Functional modern designs J-Profile J-shaped curve Integrated into door edge Curved edge look, smooth and soft feel Contemporary kitchens with curves L-Profile L-shaped channel Side or top, varies by use More visible, industrial finish Bold, semi-industrial style kitchens Flat/Edge Profile Flat strip Top or side of the cabinet edge Very discreet, often aluminum or matte Ultra-minimalist, clean designs
Profiles come in matte, glossy finishes, and in colors like silver, black, champagne, and more—matching every kitchen theme.
Now which of these profies is best for you?
The best kitchen profile really depends on your design goals and how you use your kitchen. Here's a quick breakdown to help you choose
🔍 Best Kitchen Profile – Based on Use Case:
| Profile | Best For | Why |
|---|---|---|
| G-Profile | ✅ Best Overall for Modern Kitchens | It’s fully handleless, looks ultra-sleek, and is super popular in high-end modular kitchens. Great for that luxury minimalist look. |
| C-Profile | 💪 Best for Durability & Ease of Use | Easier to grip and slightly more forgiving when opening heavy drawers. Good blend of style and function. |
| J-Profile | 🎨 Best for Aesthetic Appeal | Has a soft, curved look. If your kitchen has a lot of rounded elements or you want a gentler visual flow, this is a solid pick. |
| L-Profile | ⚒️ Best for Industrial/Statement Kitchens | More visible, and gives off an industrial or edgy vibe. If you’re going for bold styling, this fits well. |
| Flat/Edge Profile | 🔲 Best for Ultra-Minimalist Designs | Disappears into the cabinetry. If you want a “barely there” design that emphasizes clean lines, this is the one. |
What do we suggest?
Go with G-Profile if:
-
You want a modern, premium, and handleless kitchen.
-
You’re going for that sleek Instagram-worthy aesthetic.
-
You don’t mind a slightly more detailed installation.
🧰 Tools & Materials Needed for Installation
Here's a checklist of tools and materials for a smooth installation:
| Tool/Material | Purpose |
|---|---|
| Measuring Tape | For accurate alignment and fit |
| Pencil/Marker | To mark drill spots and cut points |
| Drill Machine | Drilling holes into wood or MDF |
| Screws & Brackets | Secure the profile in place |
| Aluminum G Profile | Your main handleless profile |
| Hacksaw/Metal Cutter | For trimming the profile to correct size |
| Rubber Mallet | Gentle tapping for tight fittings |
| Screwdriver | Tightening screws without stripping them |
🔧 Step-by-Step Guide: How to Install Kitchen Profiles
🪛 Step 1: Measure & Plan
Measure the length of each drawer or shutter where the profile will be installed. Mark the location where the profile will be placed using a pencil. Double-check your measurements to avoid installation errors.
🎯 Tip: Always subtract a few millimeters from the total length to allow profile expansion or slight door frame variations.
✂️ Step 2: Cut the Profile
If the profile is longer than required, trim it using a hacksaw or aluminum cutter. Ensure the cut is straight and clean. Sand the edges lightly to prevent any sharp corners that might cause injury.
🔒 Safety Tip: Wear gloves and safety goggles while cutting metal profiles.
🔩 Step 3: Drill Mounting Holes
Depending on the type of profile (e.g., G or J), drill holes inside the cabinet shutter or along its back side. Make sure you're not drilling too deep or near the cabinet edge to avoid damaging the wood.
Use a drill bit that matches the size of your screws for a snug, firm fit.
🔧 Step 4: Fix the Profile
Place the profile along the edge of the drawer or shutter and align it with your markings. Use screws and brackets to secure it into place. You can also use specialized profile clips if your hardware supports it.
For a flush finish, ensure:
-
The profile is aligned with the edge
-
No part of it is sticking out or angled
-
Screw heads are properly sunk in
🚪 Step 5: Check Functionality
Before finishing up, open and close the cabinet/drawer to ensure:
-
The profile offers a firm and comfortable grip
-
The drawer glides smoothly
-
There are no scratches or resistance
-
✅ Pro Tip: Slightly loosen or realign the screws if movement feels tight.
🧼 Step 6: Finishing Touches
Once installation is complete:
-
Wipe down the profile with a microfiber cloth to remove fingerprints or dust.
-
Polish the surface gently if it's a glossy profile.
-
Clean the surrounding cabinet edges for a brand-new look.
🧽 How to Maintain Kitchen Profiles
To keep your profiles looking and working great for years, follow these maintenance tips:
-
Clean with mild soap and water once a week.
-
Avoid using acidic or harsh cleaning chemicals.
-
Wipe down spills immediately to avoid staining or moisture buildup.
-
Inspect screws every 4–6 months and tighten if needed.
-
Lubricate sliding parts (like drawers) annually for smooth motion.
-
✨ A clean profile adds as much value to the kitchen as a clean countertop!
🛒 Where to Buy High-Quality Kitchen Profiles?
Are you looking for profiles that last long, resist rust, and elevate the look of your kitchen?
Mazix Hardware offers a wide range of:
-
G Profiles
-
Shutter & Frame Profiles
-
Telescopic Channels
-
Hinges, Tandem Boxes, and more
With sleek finishes, solid build quality, and trusted customer service, Mazix Hardware is the perfect choice for architects, interior designers, and DIY homeowners.
👉Check our Catalogue HERE.
❌ Common Mistakes to Avoid
Even experienced installers sometimes make these errors:
| Mistake | Why It’s a Problem |
|---|---|
| ❌ Incorrect measurement | Results in misalignment or rework |
| ❌ Using weak screws | Profiles loosen or fall off over time |
| ❌ Installing on soft MDF | Reduces screw grip, loosens with use |
| ❌ Ignoring edge polishing | Sharp edges = safety hazard |
| ❌ Skipping motion testing | Drawers may jam or rub against profile |
By avoiding these, you ensure a professional finish every time.
💬 Final Thoughts
Installing kitchen profiles might seem like a small task, but it's one that significantly impacts both the functionality and beauty of your kitchen.
Whether you're a homeowner planning a DIY makeover or a contractor working with premium fittings, the right profile—installed correctly—can elevate the kitchen from ordinary to outstanding.
If you're unsure which profile fits your need, don’t hesitate to reach out to Mazix Hardware for guidance. Our wide range of products ensures that you’ll find the perfect match for any cabinet system.